

What Scene Extractor is for
The overlay works best when it has a clean folder of short clips to cycle through. Scene Extractor helps you create that folder from local files, then you decide what stays, what gets deleted, and how the clips should be organized.
Use videos you own, created yourself, or are allowed to download and use. Higher quality sources usually give better overlay results, especially when you want full-screen visuals behind the hypnosphere, prompts, and your active audio session.
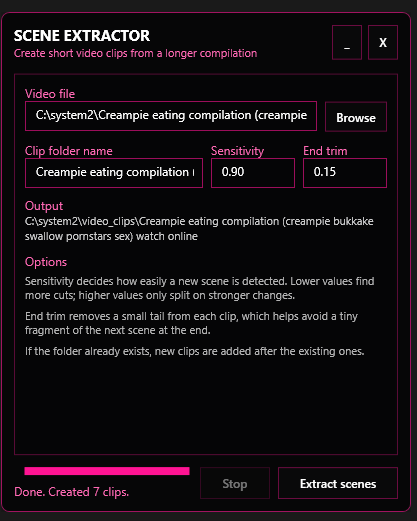
What the controls mean
Input video
The source file you want to split into usable overlay clips.
Output folder
The destination where the new clips are saved. Keep this inside your desktop content folder for easier loading later.
Clip name
A short name prefix that keeps extracted clips readable when you start collecting a larger library.
Extract
Starts the scene extraction process and writes the clips into the selected folder.
Open folder
Use this after extraction to review the clips, remove weak clips, and organize what stays.
Root folder mode
Point the overlay at a main folder so it can read from your wider clip collection instead of one single scene folder.
Basic workflow
Choose a local video
Start with a video file already on your computer. Use your own files, licensed files, or downloads the source allows you to use.
Pick where clips should land
Send extracted clips into your BambiSleep content folder under video_clips with clear folders for each theme or source.
Extract the scenes
Run the extractor and let the app cut the long file into smaller clips that are easier to mix into overlay sessions.
Clean up the folder
Open the output folder, delete clips you do not want, and keep only the parts that match the mood you are building.
Load clips in Overlay
Go to Overlay, choose Video, then Video Clips. Select the folder or root folder you want the overlay to read from.
Let random mode work
Enable random playback when you want the same audio session to feel different every time.
How the root folder option works
The root folder is video_clips, the top folder of your clip collection. Instead of selecting one small folder every time, point the overlay at video_clips and let it pull from everything you have prepared under it.
Use video_clips as your root folder.
Create subfolders for moods, creators, themes, or file sources.
Select the root when you want the overlay to pull from everything inside that collection.
Select a smaller subfolder when you want a focused session with only one theme.
Random playback is strongest when the root folder contains many short clips.
Load the clips into Overlay
Open BambiSleep Desktop, go to Overlay, choose Video, select Video Clips, and point it at the folder you just built. Mix the visuals with your hypno audio, prompts, hypnosphere, and random playback.